
Software Learning Journal
- Jan 1, 2018
- 8 min read
Christmas Break

Lesson 12, Level 6
15/12/17
No one turned up for the lesson. I practised some tutorials on In-design software through lynda.com . There were quite a few new tools similar to illustrator which I learned to use. I found it quite useful that our University is providing us with free access to Lynda.com. It have a whole library of videos and tutorials to learn software related to design and gaming.
Lesson 11, Level 6
8/12/17
We had our presentations for the module Advanced Research Strategies, so no lesson today.
Lesson 10, Level 6
01/12/17
In Today's session, It was a self learn session. We are currently working on our presentation for Advanced Research strategies. I wanted to make some info graphics using Illustrator software. So I start learning the basics of Illustrator to get a hand of it. To Start with I started to practice the pen tool, anchor tool, pathfinder and changing the colour and opacity of the fill and stroke using pen tool.
I practised the prototype of the roman text.


Lesson 9, Level 6
24/11/2017
In today's session, we watched a video of applying material in V-Ray and then following the video we practised it in class. Please see follow the final rendered image:
Final Render

Interim Render

Lesson 8, Level 6
17 November, 2017
In today's session, we practised In-design. I learnt In-design before as well but need refreshing as we will need to work on In-design on our Advanced Research Strategies module. I started from the basic of how to set up the page and make layout set margins, insert pictures and text. I practised few techniques of implementing all this to make me confident using the software.
Lesson 7, Level 6
10 November, 2017
We Learnt how to render using V-Ray in Sketch up software. We started from watching an introductory video followed by an exercise of rendering an exterior of a house using some basic tools. Please see follow final render of the image I made:

Lesson 6, Level 6
03 November, 2017
We worked on the Museum project during the session and Paul was around for help.
Lesson 5, Level 6
27 October, 2017
We continued working on the Museum project and Paul helped us with Sketch up and Auto CAD.
Lesson 4, Level 6
20 October, 2017
Today we are learning how to do masking in Photoshop. Masking is a Photoshop tool for mask. You select a new layer, it could be an image or colored layer and then click a small masking button on the right bottom of Photoshop looks its icon looks similar to Japanese flag.

We Practiced basics first,like paint brush tool on the masking layer, then we used gradients and shadows. We practiced more in detail. Please see screen shots of the Photoshop as follow:


Lesson 3, Level 6
13 October, 2017
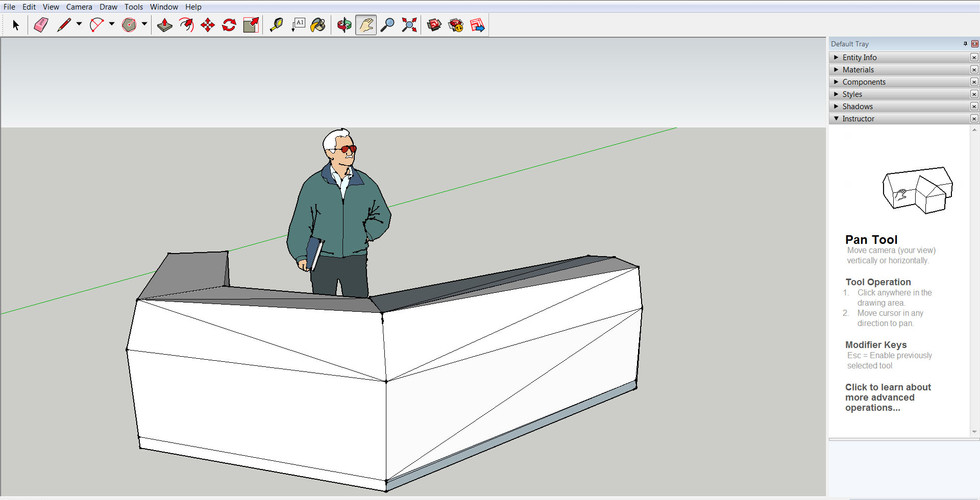
This week we started to work on Sketch up to make our Museum model. We already had a sketch up file on our blackboard but the problem was, it was just plans and wasn't on scale. Sketch up is not very good at keeping the exact measurements/dimensions so our tutor asked us to open the cad files, check the plan is right scale wise and then import in the sketch up to make model. I opened the CAD file and copy the ground floor and paste in a new file. Then from layers turn all the layers off except the "old structure" and "hatch wet". Turn off the old structure layer and copy the plan and paste next to it then turn back on the old structure layer.


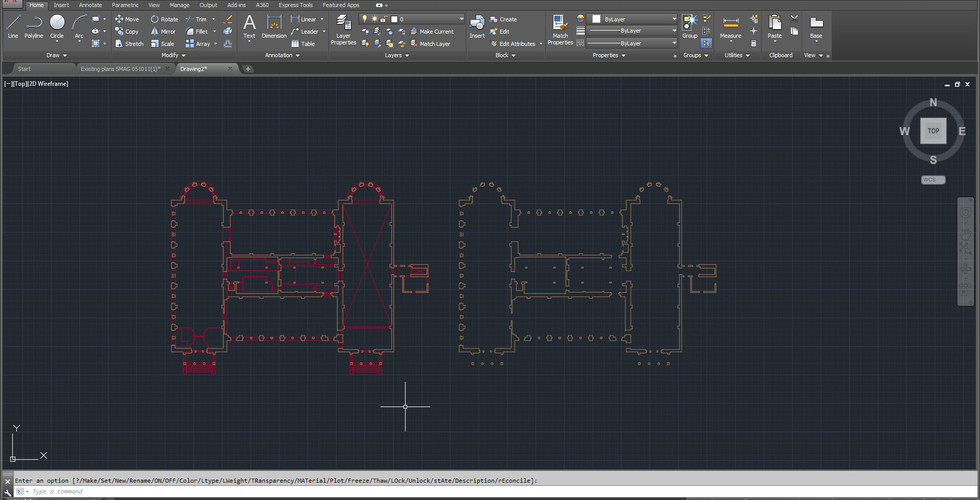
Then save the file and import in Sketch up. Before saving select all and give the command Overkill, Overkill will delete stacked lines on Auto Cad. Then import the file in Sketch up and explode the plans. Then draw a rectangle around the plans. and go the 'extensions' tab and click on 'suforyou' and from there click on make face tab. then from push and pull button bring the rectangle down which will automatically bring the walls up.

and then we can work further to make windows and stairs. we down loaded the Museum Model from Sketch warehouse and imported in our Model, scale it. its quite realistic to what the building is except the windows are smaller then actual. And we can just remake the windows and put in place.

Lesson 2, Level 6
06 October, 2017
This week we continued working on the visual of the Salford Museum and Art Gallery location. First we start on AutoCAD to make building line CAD file and then import the file in Sketch up. Then we made a rectangular face on the base and offset another rectangle. I selected all then press puss/pull button and pulled the face down which resulted in extruding the buildings then I made some setting with the Shadows and styles and made few renders to further work in the Photoshop few are the renders I produced:


Lesson 1, Level 6
29 September, 2017
This week our tutor Paul started with some information on borrowing some equipment available for us to use.So first we went to the website and registered our self through the web link bellow:
Booking.newadelphi.uk
http://salfordnewadelphi.getconnect2.com/
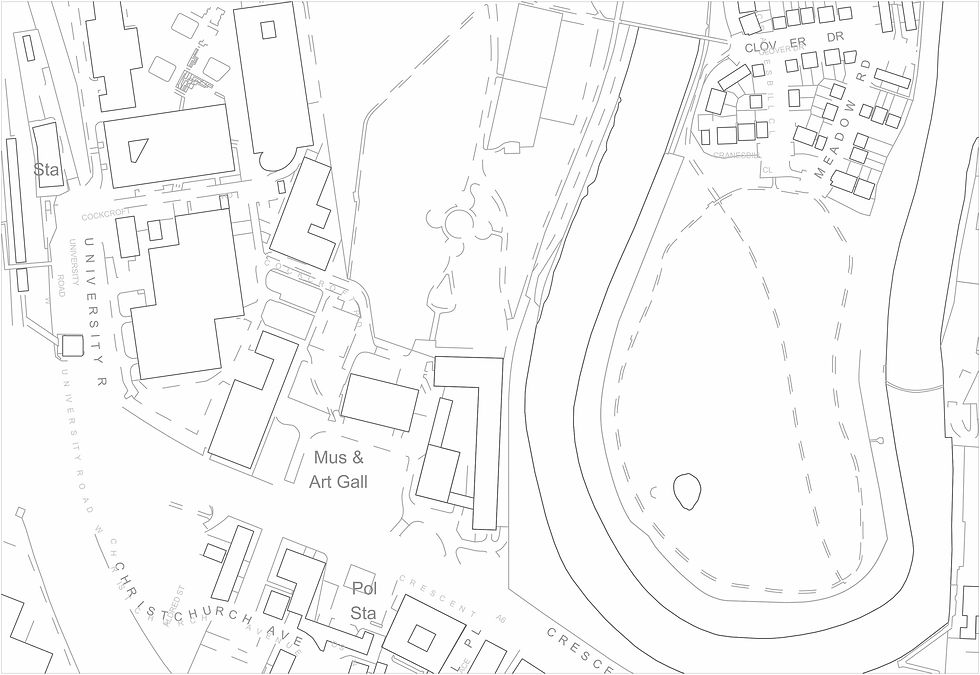
In today's lesson we will make a visual of the location of Salford Museum and Art Gallery. the lesson breakdown is as follow:
Download maps and plans of the location through Digi map
http://digimap.edina.ac.uk/
Register and then go to ancient Roam on the digmap website
There is a timeline on the top where you can wiz through to see how the area changed around time.

On the set location we made rectangle and order some maps.
Then we clicked on the tab Historic map and Ordered few CAD drawings

After downloading the plans we start making PDF layouts on AutoCAD. Please see follow the PDFs:
Lesson 19
02 March, 2016
We worked on Alex Hogrefe's visual following his online tutorial. Please see follow the final image I produced:

Lesson 18
24 February, 2016
We continued working on Photoshop and created a visual based on Alex Hogrefe's tutorials. The task was to create a top view of a model and to create shadows. Our tutor Paul gave us the two Sketchup Jpeg files one with shadows and other with lines. Please see follow the Images provided, Hogrefe's final image and the image I created:


Lesson 17
17 February, 2016
In today's class we are working in Photoshop. We learnt how we can make Sketchup images look realistic by using few tool and techniques in Photoshop. I produced few images following Paul's tutorial. Please see follow what I produced:


Lesson 16
10 February, 2016
We continued working on Artlantis. We download cafe' model in Sketchup, set up its layers set camera angles and worked in Artlantis.
Lesson 15
03 February, 2016
This Wednesday we had an introductory session into ARTLANTIS .We started in Sketchup and following on later worked on Artlantis.
First we have been told to open and download the Skectch up file of “demo ready to set”, then we set different layers in Sketchup and set different camera views saved file and open it in Artlantis to render it.
Please see bellow the screen shots of the process:


Lesson 14
20 January, 2016
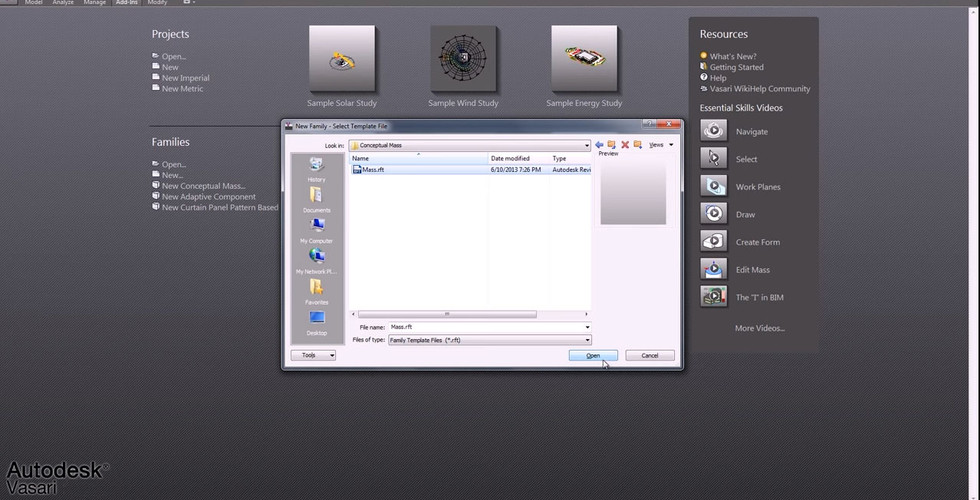
Today we were introduced a new software called DYNAMO.DYNAMO its a generative design plug-in for REVIT/VASARI, which make possible the creation of new possibilities in parametric design, beyond the products from-the-box. Its a open source initiative, this means that any one that knows something about programming can access the code and make improvements, create components, etc.. AUTODESK made their collaboration adding new nodes, functionalities and relaunching it as DYNAMO FOR VASARI, allowing visual programming in a platform that already support integrated analysis and performance based design. Right now it runs on REVIT 2013 and VASARI.
Our tutor Paul gave us few tutorials to follow from YOUTUBE. Follow are the screen shots of Getting started with nodes in Dynamo:


Follow are the screen shots of basic list management in Dynamo:


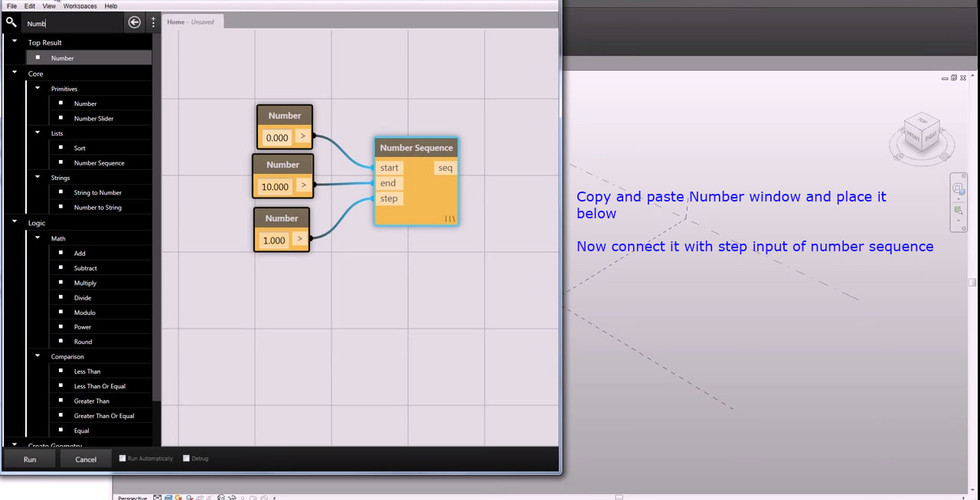


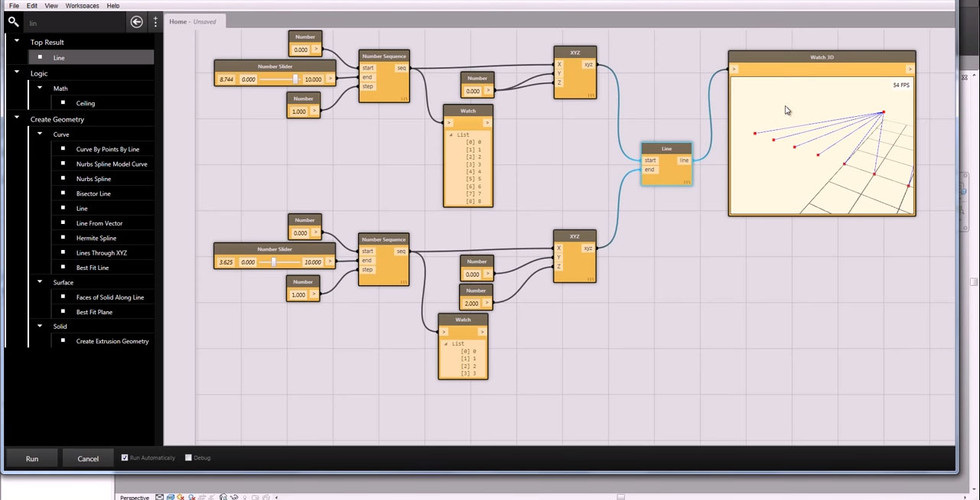

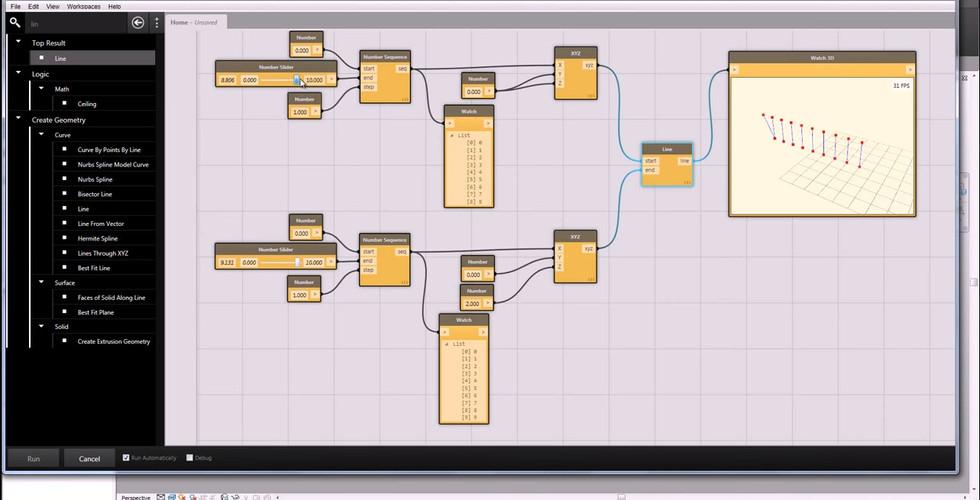
Apart from above two, I practiced Nested list management in Dynamo as well.
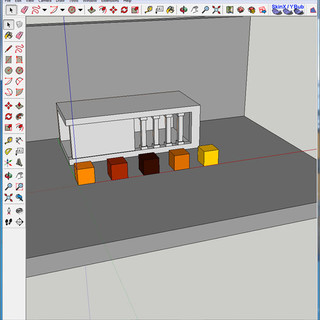
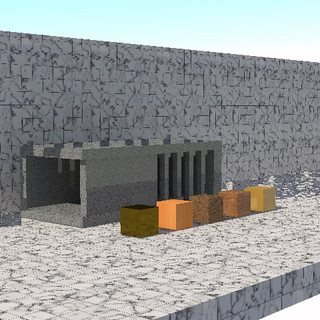
Lesson 13
13 January, 2016
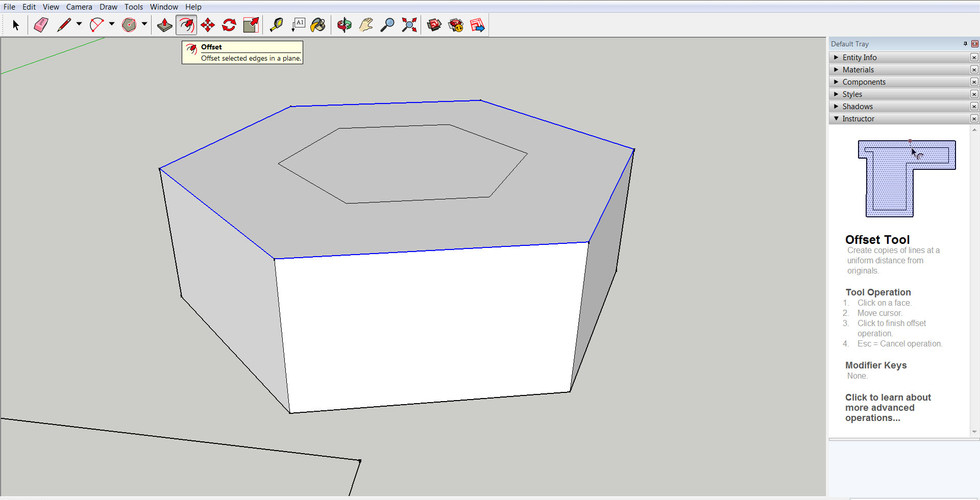
It's our first class after Christmas holidays. As there were less pupils in class Paul decided us to practice a software we like to know or improve. I decided to work on Sketchup as I explored the software my self but not had any formal session on this software. I explored quite a few tools today and created a desk. Please see follow for screen shots and notes:


Lesson 12
16 December, 2015
It's our last class before Christmas holidays so our tutor Paul gave a tutorial on how to create a GIF file using Photoshop. I created snow falling animation. Please see follow the Image from my animation:

Lesson 11
9 December, 2015
We continued working on our site plan project and we learn how to create organic shapes. Please see follow the final Images of the Site plan project:


Lesson 10
2 December, 2015
We had a presentation on presentation skills by Viv Bell. No formal session for software class.
Lesson 9
25 November, 2015
We continued working on site plan project. We have been given a tutorial on how to create and place a component in a project. Please see follow the screen shots and notes:


Lesson 8
18 November, 2015
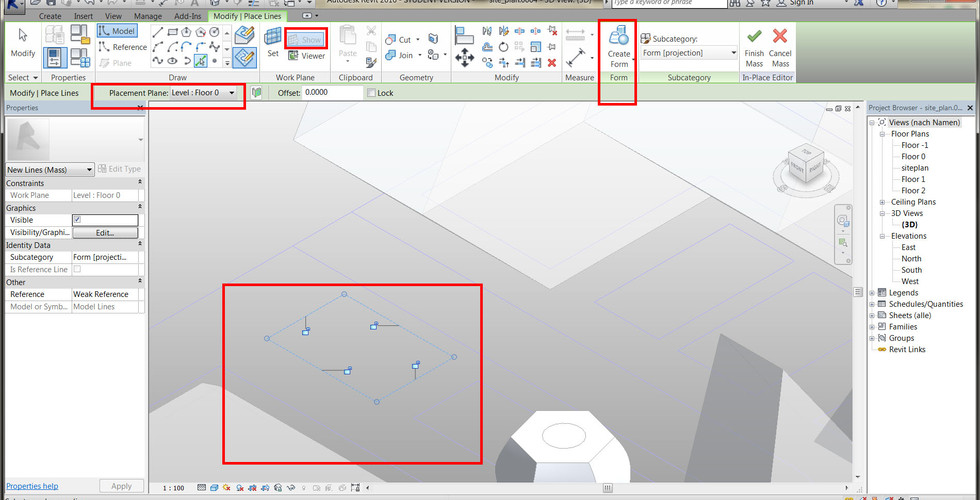
In our today's class Paul gave us tutorial on how to make a model or a component in REVIT. We have been given a site plan to work on and create different shapes for the building. Please see follow the screen shots and notes:


LESSON 7
11 November, 2015
Today in our software class, we continued working on Douglas house in REVIT. In the last class we managed to import the file from AutoCAD to REVIT. Today we continued creating the walls and levels of the house. I learned further how to create walls specially curved walls, curtain walls and glazing. In this exercise I practiced using different types of walls and it developed my skills and knowledge of exterior walls and their thickness, curtain walls and their thickness , partition walls and their thickness, Load and no load bearing walls. Please see follow the screen shot of this exercise:

LESSON 6
4 November, 2015
Today we had no formal session. We worked on our reception desk project in AutoCAD and got some help from our tutor Paul where we got stuck.
LESSON 5
28 October, 2015
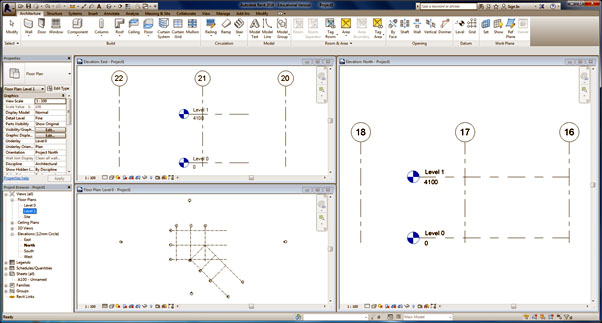
Today in our software class, we learnt how to import DWG file of Douglas house from AutoCAD to REVIT and manage the Layers and Levels. We were given an AutoCAD file of a house having 4 levels, I first changed the properties of the layers and assigned each layer a different colour, then scale it to size and made sure that the drawing is on the 0,0 reference point this is very important because when you will import the file in REVIT and the AutoCAD file is not on 0,0 reference point the file will import far away from the site. We learnt how to import AutoCAD file in three different ways. Follow are the screen shots and notes:


LESSON 4
21 October, 2015
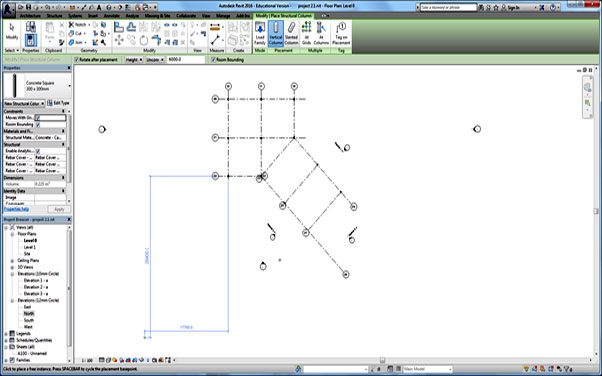
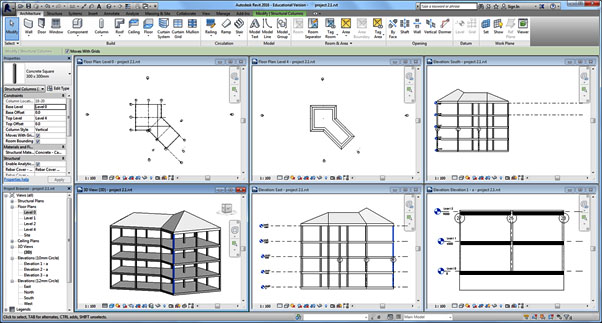
Today, we are continuing working in REVIT. Our tutor Paul gave us a tutorial on how to make topology in a site, cut around the building, and how to insert rooms into the floors and last but not the least how to make presentation board to show each rooms. Follow are the screen shots and notes:


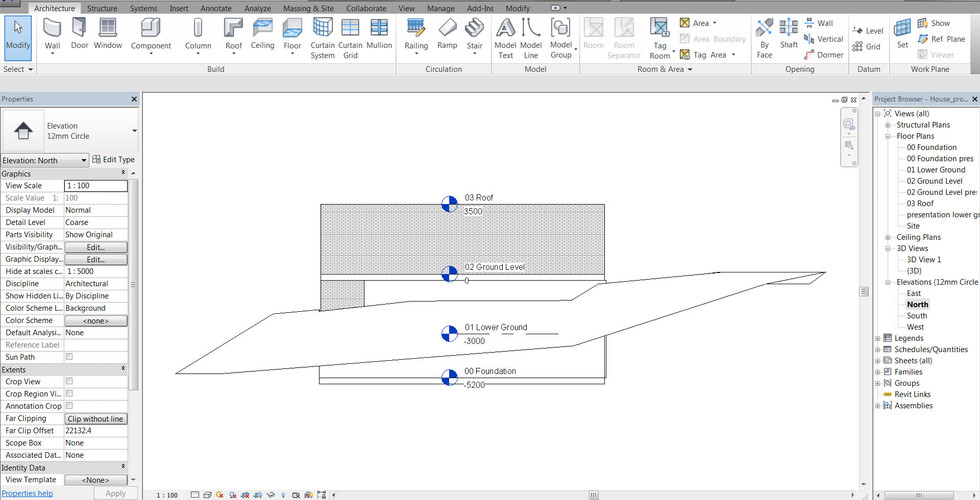


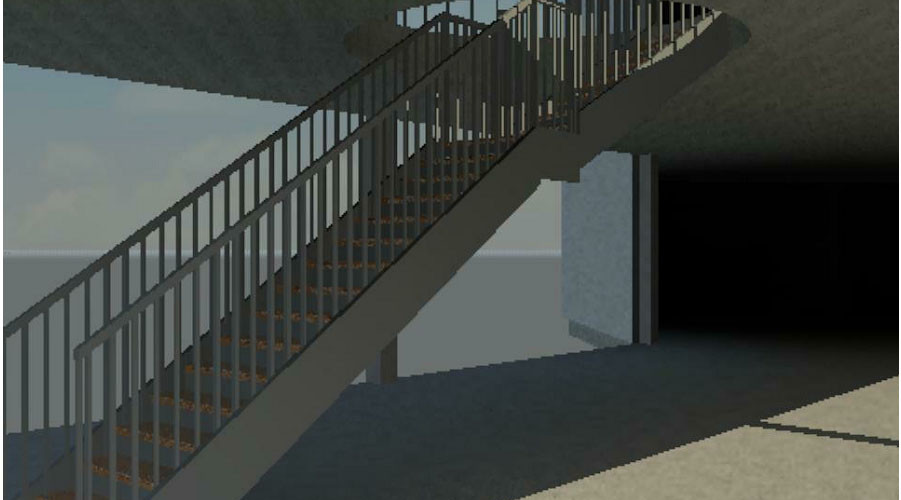
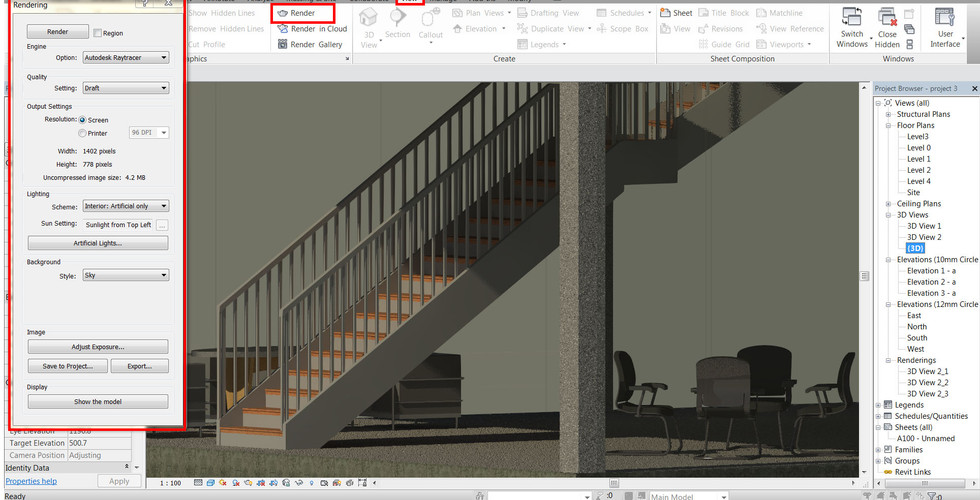
LESSON 3
15 October, 2015
We continued working on the building we were building in the last lesson on REVIT and learnt about how to insert stairs, Cut the floor, make the railing and how to use the rendering tool. Follow are the screen shots and notes:


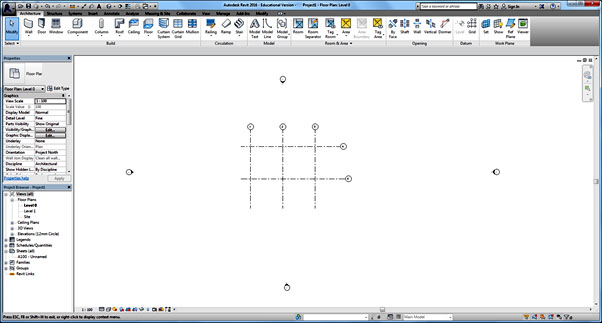
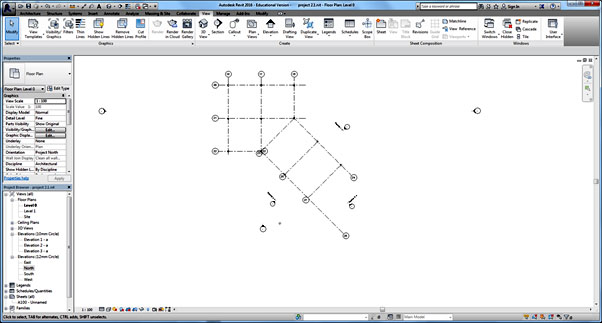
LESSON 2 8 October, 2015
We continued to learn the basic tools and elements of the program. Also started to build an office building. We learnt about how to make floors, walls, doors and columns to our drawing.
We did a quick exercise to learn fillet, trim and boundary line tool. Follow is a screen shot of what I made:
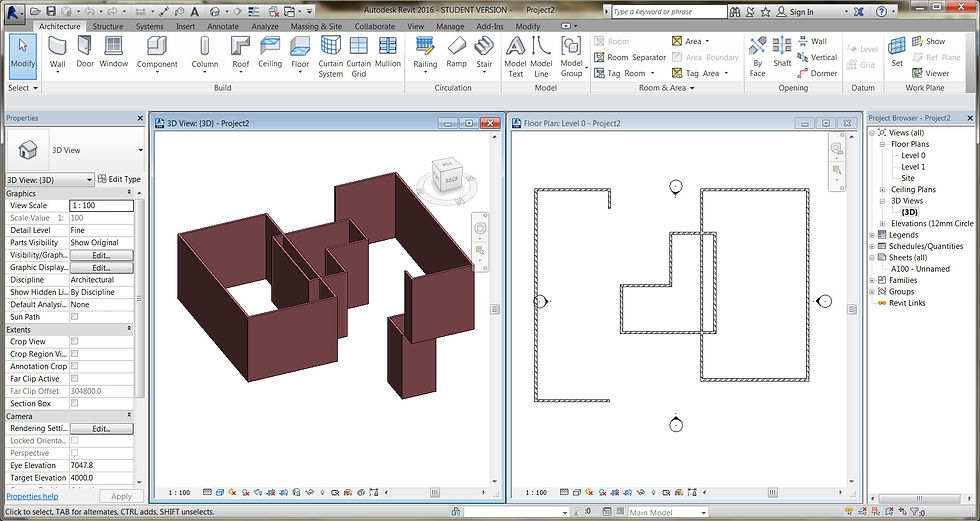
After practicing walls we started a new exercise and follow is the screen shots along with notes:


LESSON 1
1 October, 2015
This is my first lesson of learning software . I am really excited and curios to start learning a new software called 'Revit'. Our tutor Paul gave us a tutorial about the shortcuts and some basic tool. Then he let us draw a building and experiment with the tools. Follow is the journey through screen shots and notes:


Comments